Zero Target Printable
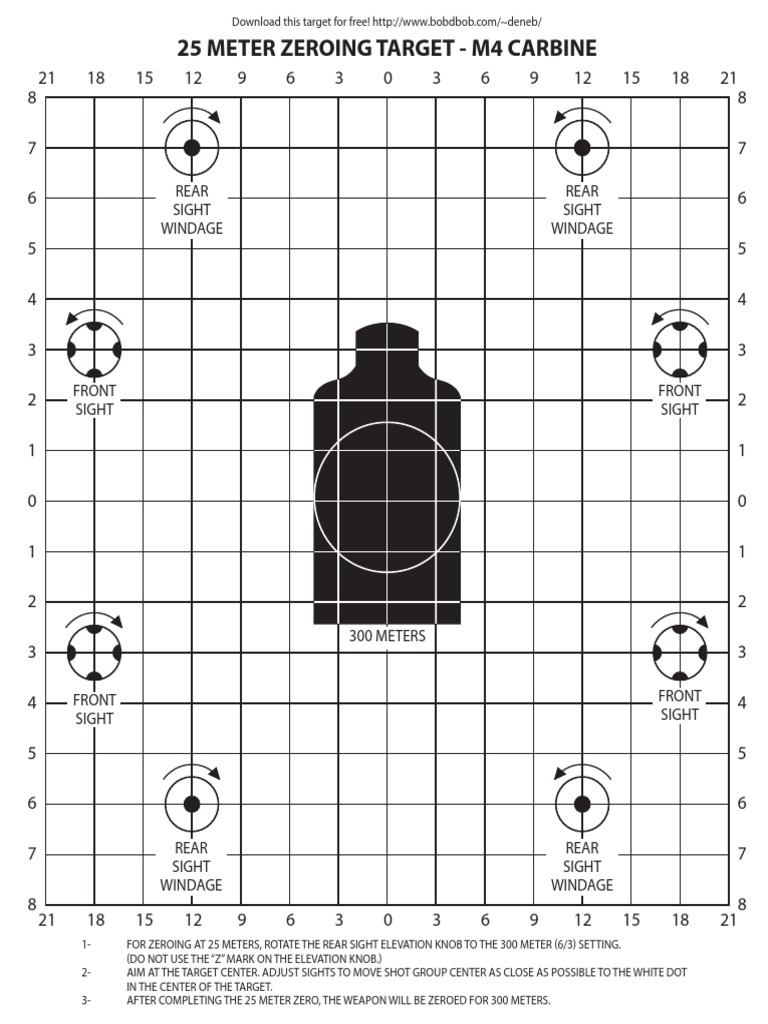
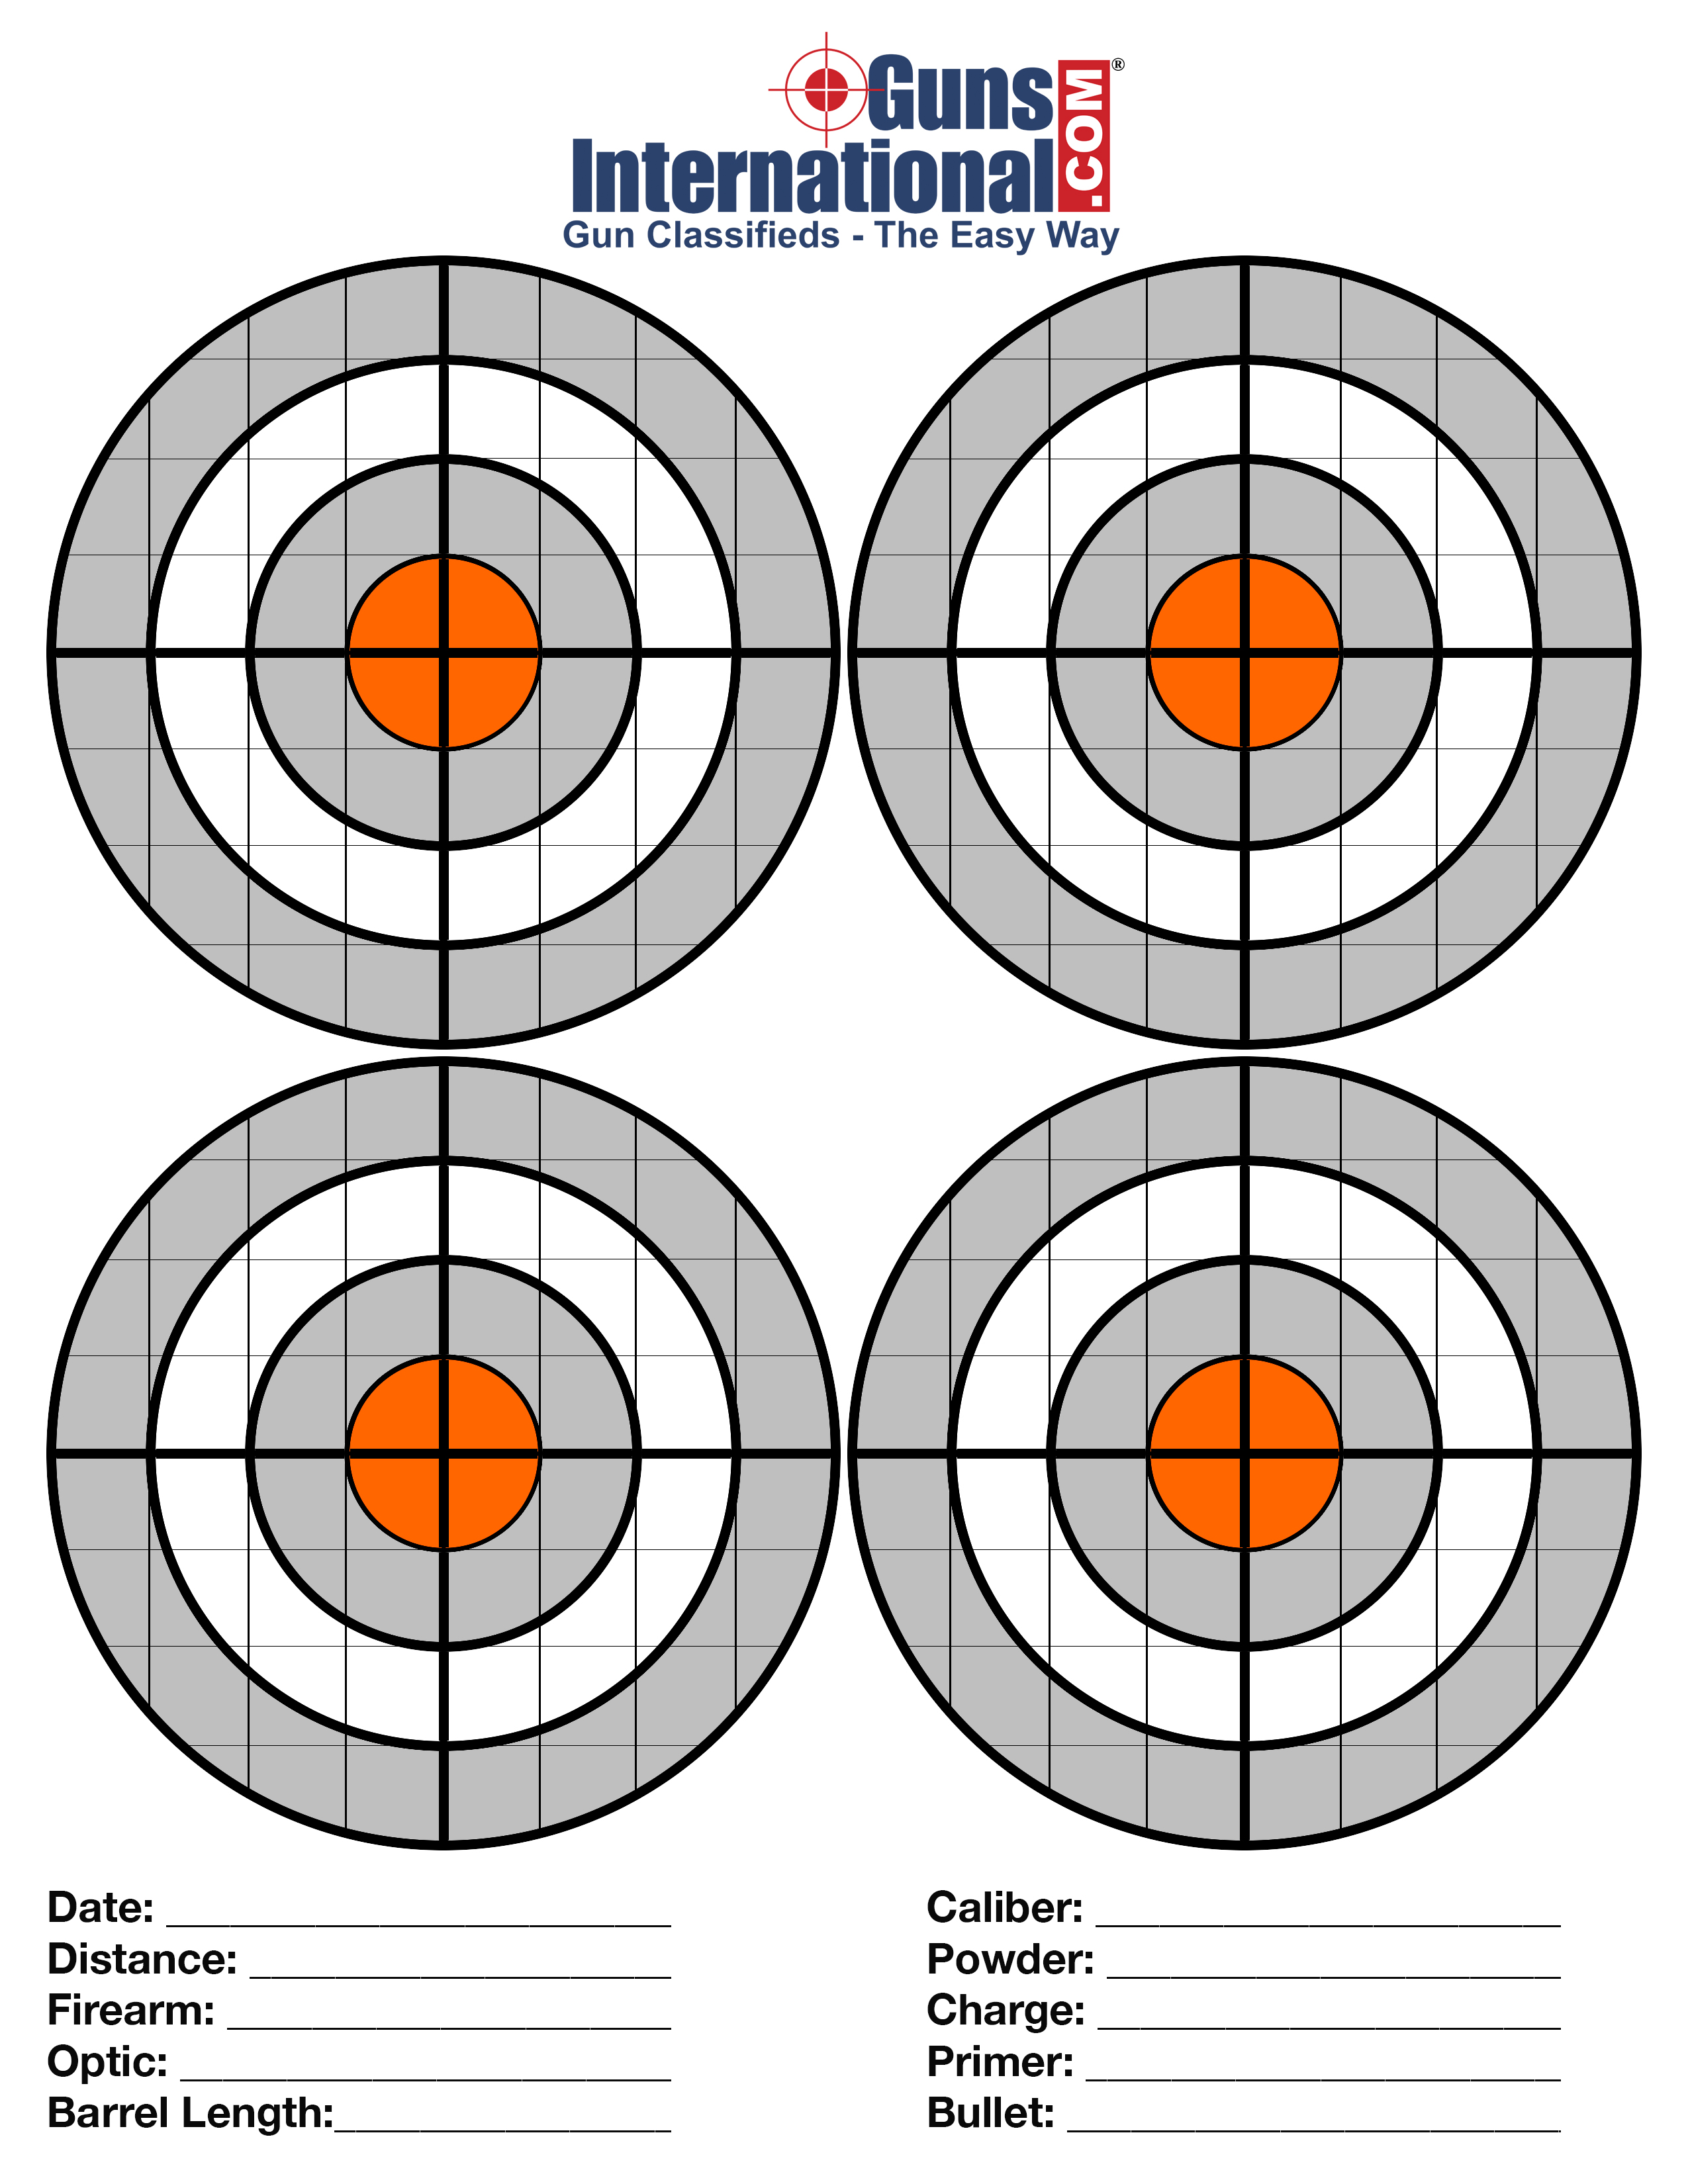
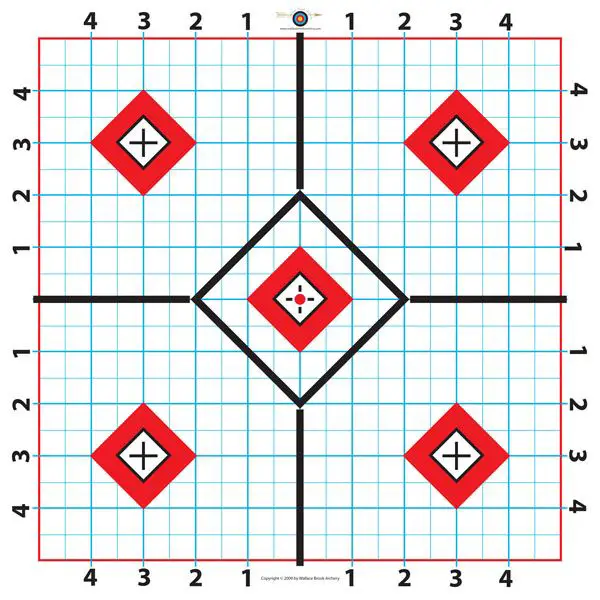
Zero Target Printable - For optics where 1 click = 1 @ 100 yds. Built it to get an instant preview of the printable zeroing target. This target will set your rifle up. Place the target at 25 yards, zero your optic so. Use corresponding numbers on target for windage and elevation corrections. Built it to get an instant preview of the zeroing target. 🙂 to suit my preferences even more, i have. 25 yard adjusted zero target for 100 yard zero using 5.56 mm ammunition. 1 click = 0.5 moa 25yd conversion: 4 clicks at 25 yards is ~1 on paper. For optics where 1 click = 1 @ 100 yds. Customize your desired zero, target distance, and other options. You can save money and a trip to the gun store by making them right now, on your own printer. 🙂 to suit my preferences even more, i have. @ 25 yards group should be centered in 1” 25 circle @ 50 yards group should be centered in 2” 50 circle @ 100 yards. R/u l/u r/d l/d 50yd poa/poi 25yd poa/poi poa poi poa poi aimpoint/eotech/lco/holosun/vortex: 25 yard adjusted zero target for 100 yard zero using 5.56 mm ammunition. (do not use the “z” mark on the elevation knob.) aim at. Print it and get a perfect zero for your pistol red dot. This target will set your rifle up. (do not use the “z” mark on the elevation knob.) aim at. Customize metrics like muzzle velocity and ballistic coefficient to build and print a zeroing target specifically for your weapon system and munition to achieve a zero with the highest accuracy. Place the target at 25 yards, zero your optic so. Hang target so that the center cross is. Calibrated for 1/2 moa adjustments per click instructions: This package of.pdf's includes 8 targets which can be printed onto your own paper or taken to a professional outfit to have sturdy targets made. 1 click = 0.5 moa 25yd conversion: 2 clicks = 1 line. Place the target at 25 yards, zero your optic so. Place the target at 25 yards, zero your optic so. R/u l/u r/d l/d 50yd poa/poi 25yd poa/poi poa poi poa poi aimpoint/eotech/lco/holosun/vortex: Use corresponding numbers on target for windage and elevation corrections. Calibrated for 1/2 moa adjustments per click instructions: I have came across a few which were pretty good in my opinion. For best results, shoot from a benchrest. Hang target so that the center cross is at the shooter’s eye level. Zero target each square = 1/2 inch aim at center dot for all distances: Print it and get a perfect zero for your pistol red dot. Print it and get a perfect zero for your optic or red dot. Print it and get a perfect zero for your pistol red dot. 25 yard adjusted zero target for 100 yard zero using 5.56 mm ammunition. Use corresponding numbers on target for windage and elevation corrections. R/u l/u r/d l/d 50yd poa/poi 25yd poa/poi poa poi poa poi aimpoint/eotech/lco/holosun/vortex: (do not use the “z” mark on the elevation knob.) aim at. This means that the bullet should have a. Use corresponding numbers on target for windage and elevation corrections. These bzo targets can be used to obtain a 50/200 yard zero for a typical ar platform chambered in 5.56mm and a height over bore of about 2 inches. Forget about sites that make you pay to print out clip art. Calibrated. Customize metrics like muzzle velocity and ballistic coefficient to build and print a zeroing target specifically for your weapon system and munition to achieve a zero with the highest accuracy. Forget about sites that make you pay to print out clip art. This package of.pdf's includes 8 targets which can be printed onto your own paper or taken to a. These bzo targets can be used to obtain a 50/200 yard zero for a typical ar platform chambered in 5.56mm and a height over bore of about 2 inches. Hang target so that the center cross is at the shooter’s eye level. Built it to get an instant preview of the printable zeroing target. A target at the desired zeroing. This target will set your rifle up. For optics where 1 click = 1 @ 100 yds. 10 clicks at 10 yards is ~1 on paper. This means that the bullet should have a. This package of.pdf's includes 8 targets which can be printed onto your own paper or taken to a professional outfit to have sturdy targets made. 1 inch square grids so that you can easier measure the adjustments needed, 1, 2, and 3 inch circles around the center so that you can. Zero target each square = 1/2 inch aim at center dot for all distances: This package of.pdf's includes 8 targets which can be printed onto your own paper or taken to a professional outfit. For zeroing at 25 meters, rotate the rear sight elevation knob to the 300 meter (6/3) setting. Built it to get an instant preview of the printable zeroing target. 1 click = 0.5 moa 25yd conversion: This target will set your rifle up. Calibrated for 1/2 moa adjustments per click instructions: For optics where 1 click = 1 @ 100 yds. @ 25 yards group should be centered in 1” 25 circle @ 50 yards group should be centered in 2” 50 circle @ 100 yards. 25 yard adjusted zero target for 100 yard zero using 5.56 mm ammunition. A target at the desired zeroing distance; For best results, shoot from a benchrest. Print it and get a perfect zero for your optic or red dot. 4 clicks at 25 yards is ~1 on paper. R/u l/u r/d l/d 50yd poa/poi 25yd poa/poi poa poi poa poi aimpoint/eotech/lco/holosun/vortex: Customize metrics like muzzle velocity and ballistic coefficient to build and print a zeroing target specifically for your weapon system and munition to achieve a zero with the highest accuracy. I have came across a few which were pretty good in my opinion. Place the target at 25 yards, zero your optic so.Printable Zero Target

Printable Zeroing Targets

Free Printable 100 Yard Rifle Targets
Free Printable 10 Meter Airgun Targets
Printable Zeroing Target
Printable Zero Targets Printable Calendar

Zero Target Printable

Printable Rifle Zeroing Targets Printable Word Searches

Printable Zero Targets

Free 100 Yard Printable Rifle Zeroing Target
A Safe Location To Shoot (Ideally An Outdoor Range) A Tool For Adjusting The Turrets (Typically A Coin Or A Turret Tool) A Spotting Scope Or.
If Everything Goes Well With Your Initial Work At 10 Yards, You Can Then Use The Black Dot To Check Your Zero At 50 Or 200 Yards Since It Should Be Relatively Free Of Impacts.
You Can Save Money And A Trip To The Gun Store By Making Them Right Now, On Your Own Printer.
1 Inch Square Grids So That You Can Easier Measure The Adjustments Needed, 1, 2, And 3 Inch Circles Around The Center So That You Can.
Related Post: